

Friday, 25 November 2011
playing with paper..
Not that exciting really, I play with paper rather a lot! BUT....this time I've been turning the paper into beads. Really really like the way they turned out, and I'm thinking the discs and rolls will end up stuck on a canvas sometime soon! Not just jewellery components, these have a fab look and will add some cool detail to larger art pieces. This is what I made.......

Sunday, 20 November 2011
UTEE Workshop!
More prep for next years classes!
We will be creating a fab UTEE canvas on 28th January at Windmill Craft Centre .
My very favourite thing, a canvas. Something that's difficult to do in a workshop setting, only two hours doesn't give much time for things to dry! So its fingers crossed that the stamped tissue technique will be something I don't live to regret attempting! We'll also be getting out the Melting Pot to create embellishments for the canvas. So two things to stress over!
Here is the sample....


The drippy, runny embellishment is another of my new favourite things, a happy accident that gets re-used over and over!
Trish x
Friday, 18 November 2011
New jewellery workshop sample!
Now that the first few workshops for next year have been firmed up (have a look HERE to see all the workshop dates so far), I'm beginning to make up the class samples.
The first jewellery class will be on January 28th, and we'll be wireworking again.
I'll be showing the students how to create a wire frame, then we will be wrapping crystals and beads onto the frame to create a fabulous pendant. Here's the sample:

 The second pic shows the beaded wire wrapping in more detail!
This one is nice and chunky, and will be finished to whatever length the creator fancies! We'll be using aubergine suede thong for this. As ever, places are limited, so contact WINDMILL CRAFT CENTRE if you fancy having a go!
Trish x
The first jewellery class will be on January 28th, and we'll be wireworking again.
I'll be showing the students how to create a wire frame, then we will be wrapping crystals and beads onto the frame to create a fabulous pendant. Here's the sample:


This one is nice and chunky, and will be finished to whatever length the creator fancies! We'll be using aubergine suede thong for this. As ever, places are limited, so contact WINDMILL CRAFT CENTRE if you fancy having a go!
Trish x
Tuesday, 15 November 2011
Last jewellery workshop of the year....
Was last Saturday, over at Windmill Craft Centre . After the mental exertions of the last three wirework classes, I decided to teach a nice, calm, relaxing stringing class for a change! We made fabulous bracelets, using buttons for the clasps. Everyone chose a unique lampworked button as their first clasp. Each was different, so everyone ended up with stunning jewellery all to their own colour scheme. The buttons were created by the most wonderful Julie Fountain of Lush Lampwork Julie makes some of the most gorgeous beads you ever saw, and her buttons are just as lovely! Here is my class sample: 
We then made a long bracelet designed to be wrapped around the wrist a few times. My favourite kind of bracelet! Again, everyone chose their own colour scheme and their own button. This time, the buttons were a choice of vintage shanked buttons I'd picked up on Ebay. My class sample:
 A great time was had by all!
Now looking forward to my 2012 classes, I'll be posting a peek of the next class soon!
Trish x

We then made a long bracelet designed to be wrapped around the wrist a few times. My favourite kind of bracelet! Again, everyone chose their own colour scheme and their own button. This time, the buttons were a choice of vintage shanked buttons I'd picked up on Ebay. My class sample:

Now looking forward to my 2012 classes, I'll be posting a peek of the next class soon!
Trish x
Monday, 31 October 2011
Just like buses.....
You wait for ages then two come along in quick succession!!
It would appear I'm the cover project on the new December issue of Craft Stamper Magazine!
I may need a lie down in a dark room at this rate.......... :)
Here is a quick peek of the cover...

Thats my tag!! Silver gilding flakes.... a very yummy technique! Have a look HERE to see all the Craft Stamper Magazine info!!!
Half term is now over, so more time to get inky and painty.Yay!
Trish xx
It would appear I'm the cover project on the new December issue of Craft Stamper Magazine!
I may need a lie down in a dark room at this rate.......... :)
Here is a quick peek of the cover...
Thats my tag!! Silver gilding flakes.... a very yummy technique! Have a look HERE to see all the Craft Stamper Magazine info!!!
Half term is now over, so more time to get inky and painty.Yay!
Trish xx
Saturday, 22 October 2011
Christmas Configurations..
Back in September, I taught a class on making a Christmas themed configurations box. Said box has now arrived home after being on display in the shop, so I have a chance to take the pics I should have taken before he went on display! Apparently there is interest in doing another one after Christmas, so its thinking cap on to decide the next theme!
The whole thing...
 A few close ups..
 The above shows a deep UTEE filled bottlecap, and a chipboard star coloured and crackle-glazed.
 This pic shows a tiny vial filled with large flaked glitter 'snow', and a wooden dangling snowflake.
 Behind the die cut, gilded 'joy' you can see some bells peeking through the fun flock snow. There is also a wreath handmade from raffia wrapped round a stickles bottle! Tied with wire and painted up a bit, I thought it looked quite effective.
 I also made a double rosette as you can see, and also a tree. This was created from folded paper not card, as I found the paper gave the sharpest creases but was still sturdy enough to stand.
 The poor cherubs face detail seems to have been filled in with stickles, but it was there at the start, honest! I made the cherubs from white air dry clay, pushed into a mould.
As you can see, the whole thing was splattered with white paint 'snow' and all the boxes filled with either glitter or fun flock. All in all, the workshop took four hours, and I was very pleased at the amount of work we managed to complete in that time! A lot of configuration boxes you see have been filled with found items, which is all well and good, but I wanted to actually create the things that went inside.
Lots of messy fun was had by all, bring on the next one!!!
Trish xx
The whole thing...


As you can see, the whole thing was splattered with white paint 'snow' and all the boxes filled with either glitter or fun flock. All in all, the workshop took four hours, and I was very pleased at the amount of work we managed to complete in that time! A lot of configuration boxes you see have been filled with found items, which is all well and good, but I wanted to actually create the things that went inside.
Lots of messy fun was had by all, bring on the next one!!!
Trish xx
Wednesday, 19 October 2011
Tuesday, 18 October 2011
Introducing 'Jim'.....!!
Last Friday I took a class with the most fabulous Lynne Perrella . A most wonderful time was had by all, and it was great to be able to watch one of my favourite artists in action. Lots of ideas and inspiration !!!
I must admit though, I did start to flag after a few hours, clearly I have no creative stamina! Those hardy souls who were there for the whole three day extravaganza have my admiration........
My finished triptych didn't look much like everyone elses.... I had to decide whether to go for the full on busy stencil look, or do my own thing somewhat. Whilst the others all looked fab, I'm a lover of a little empty space on a piece, so decided to create more in my own comfort zone. I would imagine that is not really the idea of going to a class, but I love my finished piece!
Now.....why Jim? Well, once the face and stencilled flowers had been added to my central panel, all I could see when I looked at it was Jim Morrison! I think it was reminding me of a Doors album cover or something. Once finished, it doesn't look quite as Jim-like, but the name kind of stuck.
Here it is in all its glory.....
 Some detailed bits.....the dragonfly is made from 4 layers, three tissue and one clear packaging. Sewn together with twine and accent beads added.
 I also made a layered flower by painting and stamping pre-made blank flower embellishments. I then put a stamped bird on the top.....
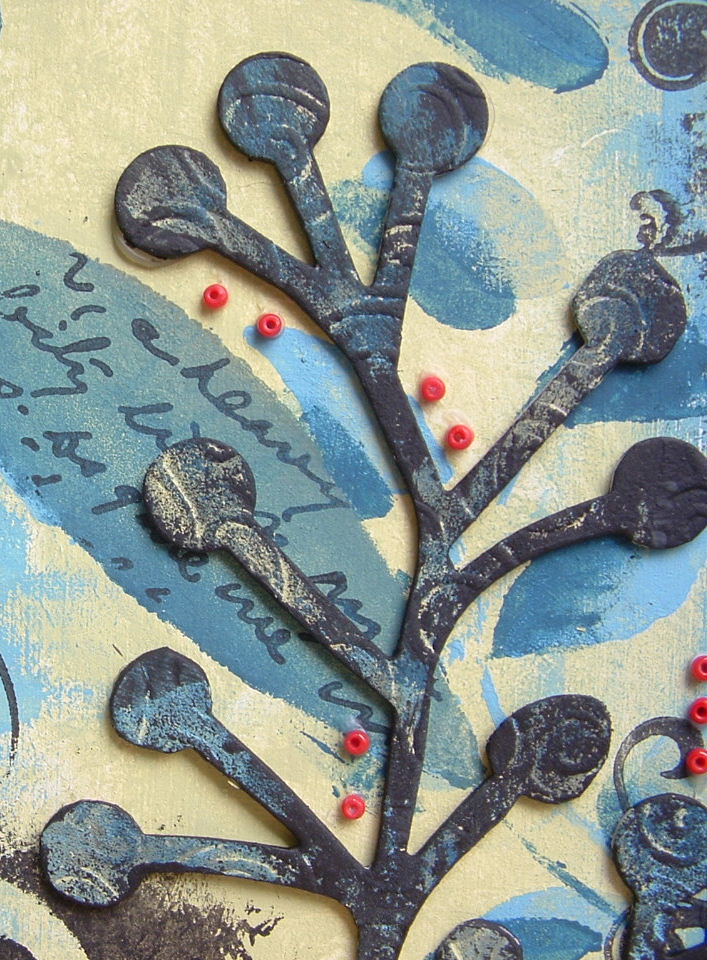
 I painted up a die cut grunge paper bobbly thing (branch? tree?), and added more red accent beads.....

More Grunge flourishes were added to 'Jims' head.......
 I may add a few more red paint accents here and there, haven't decided!
A fabulous class!
Trish xx
I must admit though, I did start to flag after a few hours, clearly I have no creative stamina! Those hardy souls who were there for the whole three day extravaganza have my admiration........
My finished triptych didn't look much like everyone elses.... I had to decide whether to go for the full on busy stencil look, or do my own thing somewhat. Whilst the others all looked fab, I'm a lover of a little empty space on a piece, so decided to create more in my own comfort zone. I would imagine that is not really the idea of going to a class, but I love my finished piece!
Now.....why Jim? Well, once the face and stencilled flowers had been added to my central panel, all I could see when I looked at it was Jim Morrison! I think it was reminding me of a Doors album cover or something. Once finished, it doesn't look quite as Jim-like, but the name kind of stuck.
Here it is in all its glory.....


More Grunge flourishes were added to 'Jims' head.......

A fabulous class!
Trish xx
Monday, 17 October 2011
Winging his way to Australia......
I'm a member of a swap group on Facebook run by the very talented Linda Baldock. The deadline for our second swap "The Animal In Me" has just past, so I thought I'd share my little bluebird friend who is on his way to his new owner in Aus!

 Again, another creation now residing in Australia!!!
I can't wait to see what creation is going to arrive with me.... usually people post a few sneaky peeks before they send, but with this one I'm totally in the dark. We shall see!
Trish x

He was made from felt, hand sewn together then with a multitude of beads added. I'm not a 'deep' person, so all of the representational stuff just passes me by......basically, I'm a bird with a load of beads, so that's what I made!
The first swap we did was an Art Doll. This is the doll I created......

I can't wait to see what creation is going to arrive with me.... usually people post a few sneaky peeks before they send, but with this one I'm totally in the dark. We shall see!
Trish x
Thursday, 13 October 2011
squeeeeeeeeeeeeeeeee!!
My bottle cap bracelet made the cover of the latest Beads and Beyond magazine!!!.
Here's a little peek of the cover...

Yay! Not had a cover for ages so very pleased!
Now need to calm down and get organised for the Lynne Perella class I'm taking tomorrow. Should be fun!
Trish x
Subscribe to:
Posts (Atom)