Thursday, 13 June 2013

Adore- Dimensional Glitter Hearts!

Hello!
This weeks project for Creative Expressions has a totally different feel, colour wise, to my recent creations!
We were sent some totally gorgeous gunmetal coloured glitter to play with this month, and I decided to keep things a little dark this week....
I used the glitter to make the dimensional hearts on my tag, springing up like weird and wonderful flowers!
I mixed the glitter with resin, and poured it into the spaces in a heart shaped silicone ice cube tray. Once the resin had hardened, I popped out the heart shapes to use as embellishments.
A similar kind of effect can be achieved by mixing the glitter into molten UTEE, and then pouring into the mould. I wound some wire around a knitting needle to create coils, which I then cut to size. The coils were glued to the back of the hearts, then the hearts were glued to the tag. As they are attached so securely at the top, the wire coils stay in place at the base of the tag.....
If the coils look like they're popping up, a dab of glue behind them will sort them out! When this happens to me, I always put a bit of fringed paper over the coils to hide the glue.
The background itself is a size 8 black tag. I brayered some white paint over the tag, then added a little stamping. I stamped the chicken wire and the plaid background using red paint, and the floral flourish from the Floral Silhouette plate using black ink...

I also sponged the red paint through a dotty stencil. The finishing touch is a Chit Chat sticker, the word 'adore' linking in with the heart embellishments.
Something a little bit grungy, showing you can use glitter to create embellishments as well as adding sparkle!
Love Trish xx


Monday, 10 June 2013

Princess Chunky Button!

Hello!
Last weekend I had a play date with a friend..... Paula came over and I made her get painty! I made an art doll chunky ATC....
The wooden chunky ATC base was covered with a wash of gesso first to give me a base, then I sponged and smeared yellow and blue paint over it randomly. Once dry, I scraped black puff paint through a stencil to give some texture...
Bits of black stamping here and there..... then I added the wings (Cherry Pie Art Stamps) and her head (Octopode Factory)...
I felt it needed a pop of colour, so i gave her a bright red heart! I made this by pouring dyed UTEE into a mold...
The final touch were the feet, made from buttons stacked and glued together. I painted them up to match the rest of the Art Doll, then glued them on....

As luck would have it, the challenge this week over at Simon Says Stamp And Show is all about buttons, so I think Miss Princess Chunky Button fits right in!
Have a great week everyone!
Trish xxxxx


Saturday, 8 June 2013

Oh My Dear!

My turn over at A Sprinkle Of Imagination today..... must be inspired by the sun this week as its a bit yellow!
I'd love it if you popped on over to the blog and had a look at the whole thing!
See you soon,
love Trish xxx

Thursday, 6 June 2013

Summer Sunshine!

Hopefully the weather is still nice and warm where you are today...I have a horrible feeling that this could be summer, all we're going to get this year!!!
Any excuse to break out the summery colours for my project for Creative Expressions this week!
I've combined stamp sheets again, the Asters from last months DT set, and the butterfly from the new plate we have to work with, the Floral Silhouette plate.
The background on the panel is done very simply and quickly. I sponged on white paint, making sure it was a bit 'blobby' and thicker in some places. This way, once its dried, you get a nice uneven texture to work on straightaway. I simply smeared  Raspberry and Citrus paint onto the white to give the shabby chic look...
This panel is a very dimensional piece, and I've taken a pic from the side to show you....
The flowers were all stamped onto copy paper rather than card, as this means you can manipulate the layers more. I have curled them all upwards, to give a kind of water lily type look!
The butterfly was stamped onto card coloured with Picked Raspberry Distress ink. I cut off the 'feelers' and added wire instead...
The butterfly is held in place with a thin strip of acetate. Invisible (which is the point!) and very springy, which gives the butterfly plenty of movement!
Enjoy the rest of your week!
Trish xxxxx


Monday, 3 June 2013

Remember- A Twine Frame

Hello!
I made a little panel, complete with a frame made from twine in the middle! Here is a little peek...
The whole project is now live over at the Calico Crafts Blog! Loads more pics so you can get a better idea of whats going on!!
Have a great week everyone!
Trish xxxxx

Sunday, 2 June 2013

Chaos!

Yep.....three days in a row! Don't faint....there's another one tomorrow too! I may need a lie down in a dark room.....

Hello!!!
I've been playing with ink and compressed air....... little peek...
The whole thing is now live over at the A Sprinkle Of Imagination blog.... please pop on over and have a look!
love Trish xxx

Saturday, 1 June 2013

Sweetie!

Hello!
Have you checked out the A Little Bit Crafty challenge blog yet? no? you should......!
Paula is doing a great job of bringing loads of crafters together, whatever their styles or tastes. With each challenge having a broad theme, and the fact you are positively encouraged to enter any kind of craft at all, these challenges have proved very popular so far!
Whilst my messy painty style may look a little 'out there' compared to some of the other players, that is the whole point! If I can encourage just one neat and tidy crafter over to the dark side of mess...then my job is done!!! he he he.....
Anyway, my contribution to the brand new 'something sweet' challenge....
I started off with a plain canvas board. My first job was to add some texture by scraping texture paste through stencils. I've done this with two different designs, a harlequin and a more 'dotty' pattern....
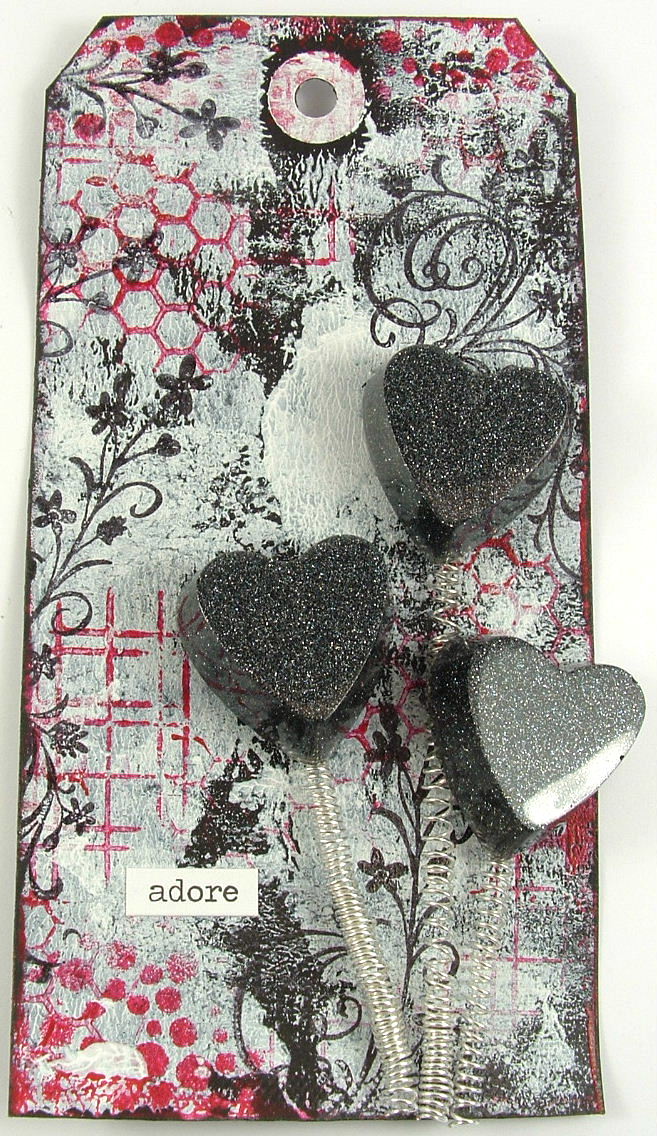
I also glued down a few wooden embellishments. I've kept it quite simple for this panel, just using two scalloped borders and a few wooden hearts....
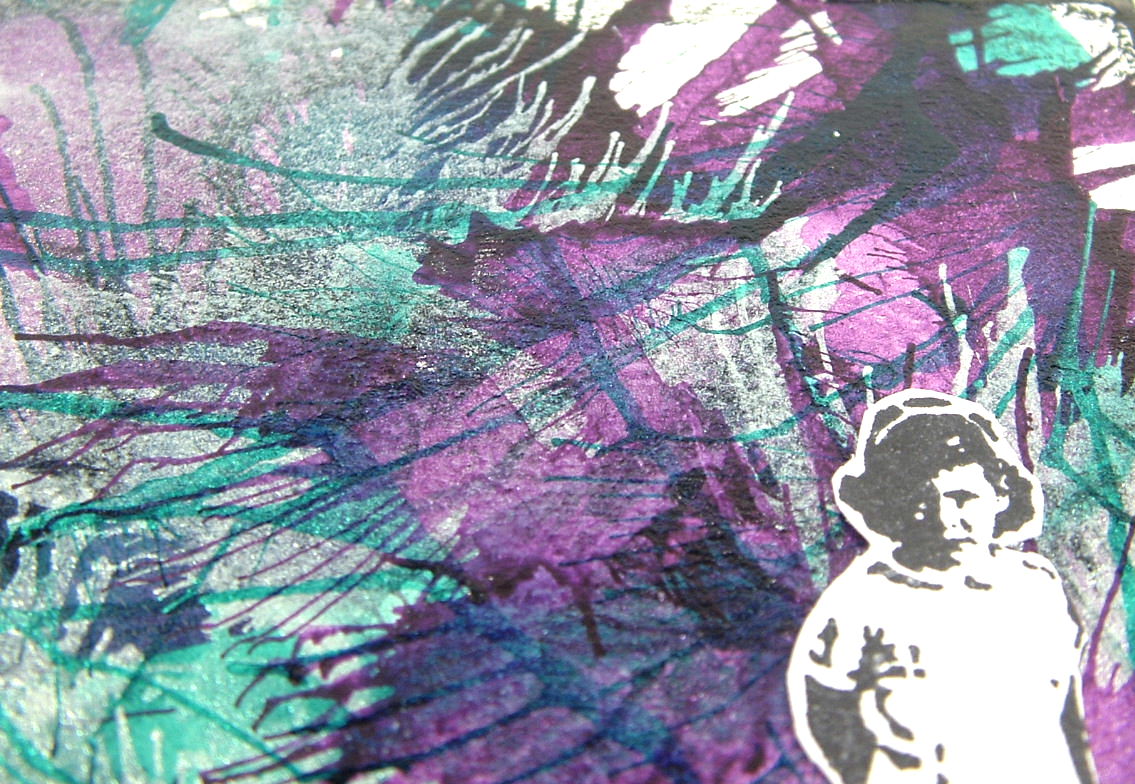
I then gave the whole thing a coat of gesso. This gives an even white covering to the entire piece, so the additional colours I want to add on top will make everything blend in seamlessly. I used a simple colour scheme of red and turquoise, simply smearing the turquoise paint on with a makeup sponge. Once the base colour was dry, I then went in with the red paint to do a little printing. I've used lego pieces and bottle tops for this! I also gently rubbed some red into the raised areas here and there...
I added some stamping too, using black ink. These particular stamps are unmounted, so I can use just a little of the design, and its a doddle to add random bits here and there! A few black splats of paint (flick a loaded paintbrush at it!), and the background was done.
I painted the larger heart with red paint, then once dry covered it with Crackle Glaze. I smeared a little black paint onto the dry crackles, just to grunge it up a little!
My little girl is a simple stamped image by Paperbag Studios. I'm not a scrapper at all, but if you are then this kind of design works fabulously with photos!!!
The finishing touch were some Alphapart letters....
So, you can still be a sweetie whilst being grungy and messy at the same time!
Have a play with paint, you'll love it!!!
Trish xxxxxx


Friday, 31 May 2013

Flower Girl?

Hello!
I'm a little later posting this today....I got totally distracted by about 50 donkeys outside my window......really!!!!
I should explain. My house backs onto the very large car park in Blackpool. When I opened the curtains this morning there seemed to be all of the donkeys in Blackpool clip clopping around the car park! (with owners, of course, although much more entertaining if not!!) I'm guessing it was some kind of assessment thing, they were all being checked for fitness, having their pictures taken.... anyway, very distracting!!!
So..... todays project! I made a painty panel for Creative Expressions....
I've used lots of stamps, and combined them all together to make a weird and wonderful (well I think so!) art doll....
I started off with a torn cardboard panel, just love the exposed texture...
I smeared and scraped red, blue and black paint across the cardboard to colour it, then got busy with some printing in the same colours...
(for some reason, looking at the above picture I can see a bloke wearing a cape riding a motorbike.....)
I used the chicken wire stamp, along with the alphabet stamp too....
My doll is composed of three different stamps, the large Aster from the Heartfelt Creations set, the Steampunk Dressform, and a Tatty Button figure....
The Tatty Button figure is actually a Christmas stamp, and a lot of that hair is technically part of her hat! I think I just about got away with it though!!!
All the dots you can see are a little technique you can have a go at to create a little texture and splat effect without getting the paints out! All the dots are individual crystals of UTEE, sprinkled sparingly then melted in....
I typed the phrase, and added it to finish...
A little bit of fun for what has been a very odd day here so far!!!!
love Trish xxxx


Saturday, 25 May 2013

Windows Ten

Hello!
I hope everyone is having a great weekend!
Today is my turn over on the A Sprinkle Of Imagination blog, and I'm sharing a little exercise in minimalism....... well not in the paint department, but in the ephemera department!
Loads more pics can be found over here!
Love Trish xxx

Thursday, 23 May 2013

Aster Spool

Hello!
This weeks creation for Creative Expression again uses the fabulous Delicate Aster stamp set by Heartfelt Creations. I really think this flower set is right up there with my fave flowers of all time, four sizes and it stamps so beautifully! (and I'm not just saying that because I have to!!)
I've gone for a more edgy look this week.... none of the pretty colours this time..
I stamped the asters onto book pages and acetate before layering them together...
As you can see, I gave them a smidge of colour by splatting them with red paint!
I wrapped a wooden skewer with an old book page before twisting a little wire around it. This became the stem for my flower. I stamped the leaf onto a book page and acetate, and attached them to the stem with more wire...
The spool was an exercise in restraint for me...I really don't use these much without covering them completely with paint!!! I added a few torn book pages, wire and more splatted paint. I typed the phrase and then added it to the spool as the finishing touch...

I really like how all the design team have managed to use this set in so many different ways... check out their blogs from the sidebar here...

Have a great day.... its blowing a gale and hailstoning here in Blackpool, its a 'jumper on and turn the heating up' sort of day...its nearly June, how silly!!!!!!
Love Trish xxxx