Week three of my Guest Designer month over at the Stampotique Designer Challenge Blog ! Thank you all once again for the lovely comments made on my 'pairs' piece last week!
This time, the challenge is all about acetate. I love using acetate in all kinds of ways, and for this challenge I decided to use it to help me create some depth to my piece. Which is this....
I made a shrine type assemblage, lots of layers and a cool red and blue colour scheme! You really need to see this sideways on to see how my elements are layered to give the depth...
To build up these layers, you need to have a base you can build up in layers too. That way you can add elements as you go along. There are chipboard designs out there that you can layer up wonderfully, but I decided to make my own. That way, I have total control over the size and shape. This is a little fiddly, but I'm going to take you through it, step by step!
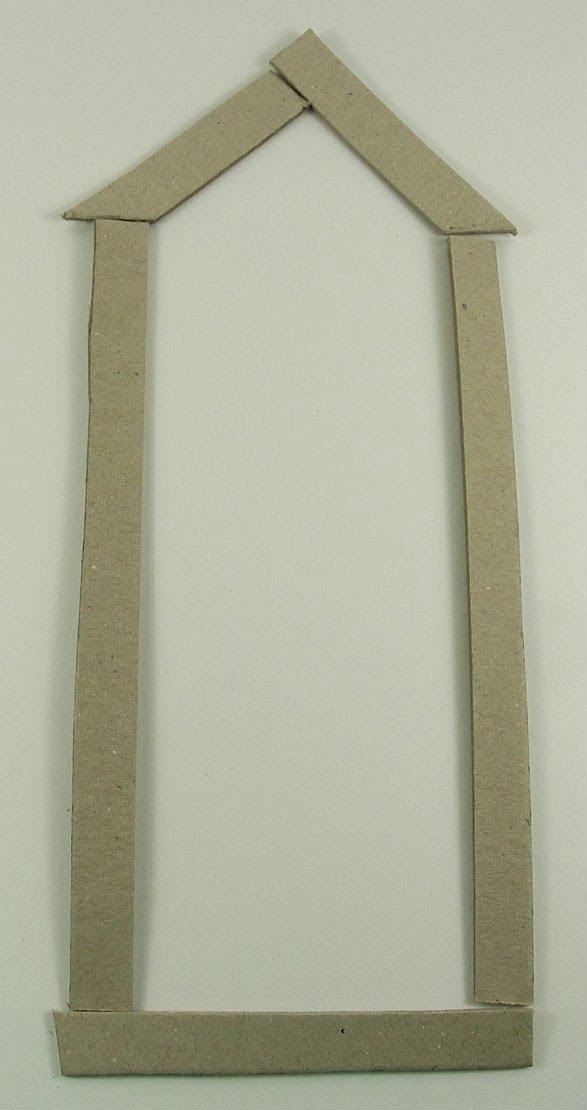
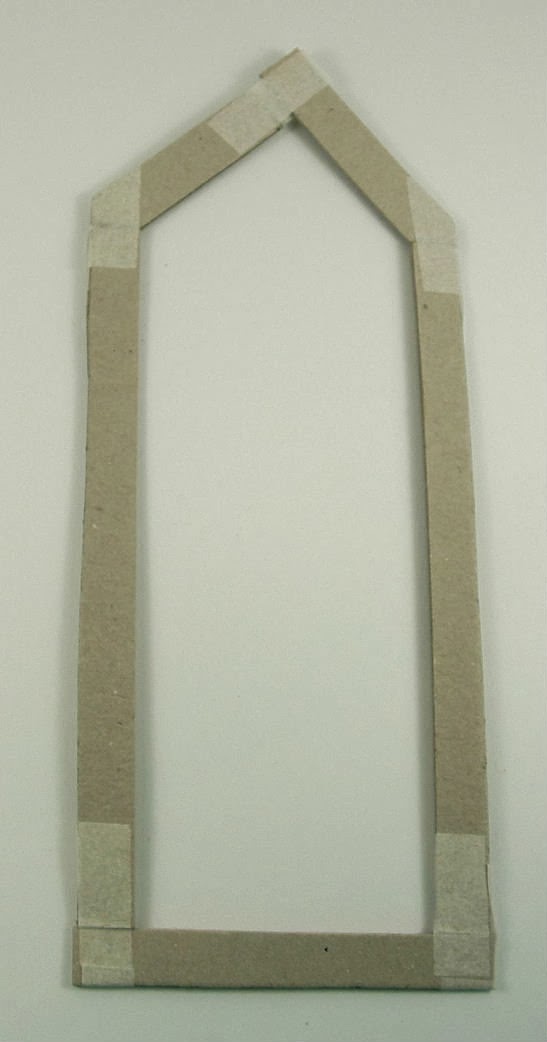
First, I decided on the shape and size of my shrine. I then cut strips of greyboard to create the frame.
Don't worry about exact measurements, the finished frame will be covered in layers of paper and paint anyway! I stuck the first frame layer together with masking tape...
I then glued more strips over the first lot, giving me a frame two layers deep.
Next, acetate time! Stamp the seaweed design onto acetate, then colour the blobs! I love to colour acetate by painting the design on the stamped side, then flipping the acetate over so you have a smooth shiny finish!
A third and fourth layer of greyboard frame was then added on top. Bulldog clips will keep everything together whilst the glue dries!
(As you can see, I chopped the excess image off!!)
The main figure image is the next layer, so I stamped and coloured her, before adding wings made with more acetate! The wings are coloured with paint too. I cut her out, leaving an extra bit of card under her foot. This was then glued to the top of the fourth layer of greyboard...
The fifth and final greyboard layer was then glued on top....
If you have an image that exceeds the limits of your frame, make sure you don't accidentally glue the wrong bits down! I had to keep a careful eye on the right hand wing!!
Once the frame is dry, its ready to be covered with old book pages. The most fiddly part of the frame to get access to is the inside, so we need to deal with this first, before we put the back on!
Tear tiny bits of paper to cover the parts where your acetate and card elements go into the frame. Once dry, it can be painted...
I wanted another red dotty seaweed element in my shrine, so created another using acetate in the same way as before. This time, I needed it to be slightly larger, so carried through the 'stems' by drawing lines with a permanent pen...
This time, I stuck it to the very back of the frame, slightly behind the figure....
Next, the back. Draw around your shrine (or whatever your shape is!), onto cardstock, then create a messy painty background!
I've added in some printing, then melted sprinkles of white UTEE to give both a gentle splatter effect and a little texture. The back can now be glued to the frame....
More old book pages are now glued on, to cover all the frame that is still visible!
Once the glue is dry, the top and edges can be painted to match the back...
I added tiny red dots as well, just to tie in my colour scheme!
The final touch is the star on the apex of my shrine...
Acetate again! Topped off with a word sticker.....
So, all finished! Mary is looking very folorn, despite her shiny wings...
Let's hope she can wish upon that star and cheer up a bit!!!!
Hope you like my project this week...
Stampotique stamps used:
Mary
Seaweed
Big Bee
Jo's Star
See you next week for my final GDT project!
Trish xxxxx


It's gorgeous Trish
ReplyDeleteWow!!!! You do have a very creative mind and the talent to make it come to life!
ReplyDeletesandy
It's both cute and cool. I'm diggin it
ReplyDeleteThis is really gorgeous, I love ALL on this!!! What a great artist you are... Thank you for the step-by-step, that's great to know the details ;-) Coco x
ReplyDeletePure genius, Trish. Love the combination of red and turquoise. Great use of acetate! Thanks for inspiring us all! Mwah! KayW
ReplyDeleteTrish, I really love this. just gorgeous.
ReplyDeleteLove, the way this came together. Awesome!!
ReplyDeleteLove it! Fab use of acetate and some really cool stamps! Hope you become a permanent member of the DT!
ReplyDeleteAbsolutely Incredible!! How clever you are. The whole project from construction to colours & brilliant way of using acetate - pure magic!! (note to self: must remember I have a pack of acetate..). Tfi :))
ReplyDeleteI love everything about this.
ReplyDeleteCorrie x