Wednesday 16 November 2016

The STAMPlorations Giving Thanks Blog Hop!


Hello!
I'm so thrilled and honoured to be representing the Craft Stamper Take It Make It Blog challenge in today's Giving Thanks Blog Hop!


STAMPlorations are having a fabulous blog hop today, all about Giving Thanks! Lots of designers have all created a project using one of the Giving Thanks bundles, a great set that includes stamps, a stencil and dies!
I used the Oh So Grateful Bundle: 


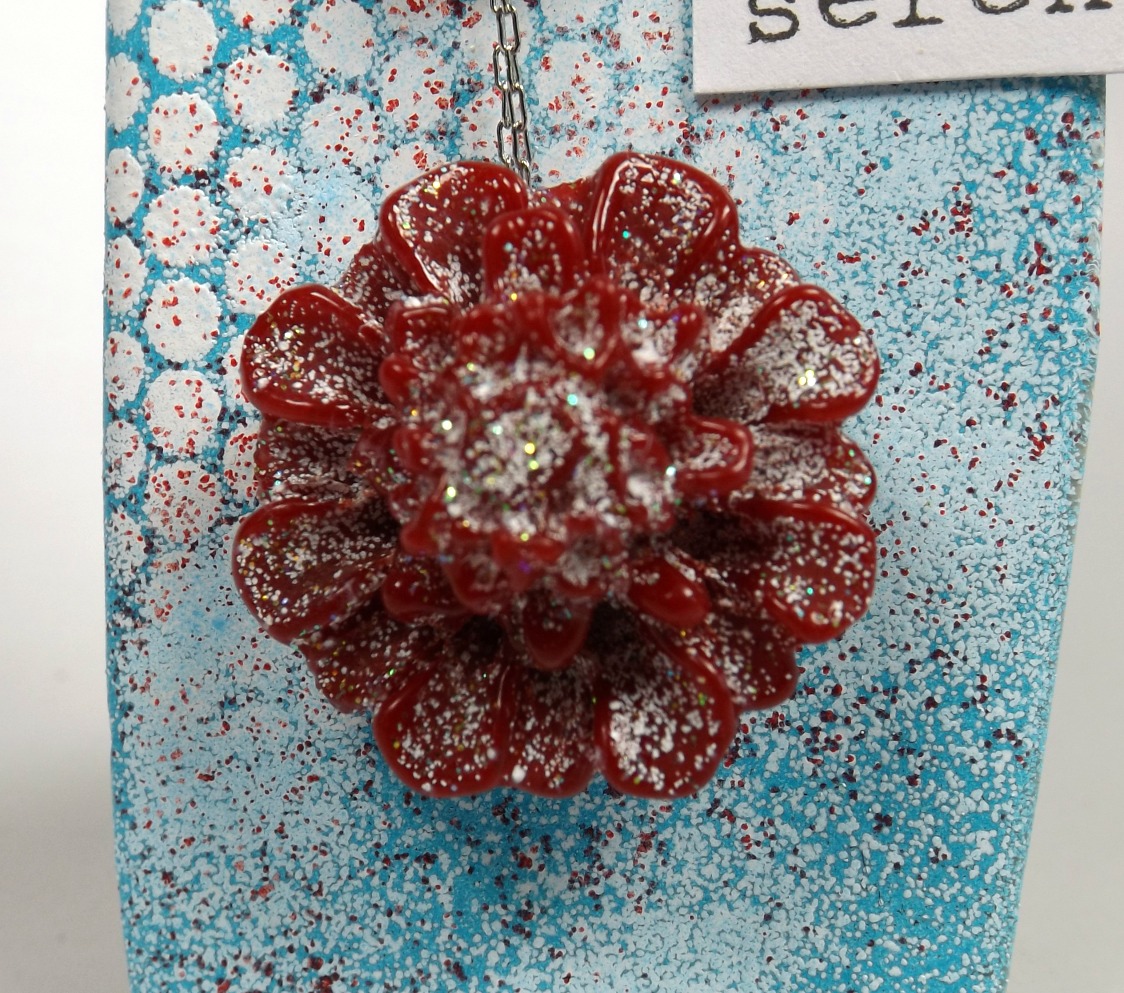
And used it to create this....


Admitedly, not your usual Fall or Thanksgiving colours :)
I used the stencil to create a texture paste design as my background...


This was sprayed with a variety of inks to give a multi coloured look!
The pumpkin was stamped onto purple and teal painted card, then cut out using the matching die! I used the purple leaves on a the teal pumpkin..


The words I used are a combination of stamps on their own (Oh, so) and stamps and a die (the black stamped 'gratetful', cut out using the matching die)


As you can see, I also added one of my hand drawn Whimsy Girls! I think she looks very grateful for her fabulous teal pumpkin, don't you?!

As well as the fabulous eye candy to be seen along the hop (more about that in a minute!), there are also prizes to be won!

Giving Thanks Hop

  • ONE (1) winner randomly drawn from all comments left on the STAMPlorations blog and participating designers blogs will receive a $50 gift certificate.
  • THREE (3) winners randomly drawn from all comments left on the STAMPlorations blog and participating designers blogs will each receive a $20 gift certificate to the shop.
  • ONE (1) commenter randomly drawn from our Facebook page will win a $15 gift certificate for herself and a $15 gift certificate for one friend she tags in her comment.
  • ONE (1) commenter randomly drawn from our Instagram account will win her choice of Giving Thanks bundle (Be Thankful, Oh So Grateful, or Many Blessings)/
Commenting ends on November 30 at 11:55 p.m. Pacific

You can also create your own 'Giving Thanks' project, and link it up over on the main STAMPlorations blog, there are prizes to be won that way too!

Giving Thanks Linky Party
  • ONE (1) winner randomly drawn from all entries linked up will receive the Be Thankful bundle (stamp set with coordinating die, word die, and stencil)
  • ONE (1) winner randomly drawn from all entries linked up will receive Oh So Grateful bundle (stamp set with coordinating die, word die, and stencil)
  • ONE (1) winner randomly drawn from all entries linked up will receive Many Blessings bundle (stamp set with coordinating die, word die, and stencil)
[Players have until November 30 to link up their projects to the linky party.]


Winners will be announced on December 9 in the November Challenges and Hops winners post. Winners have until December 20 to claim their prize.
Phew :)
Have a great hop everyone!
Trish xxxx


Wednesday 7 September 2016

Capture the Moment!

Hello!
Today I wanted to show you one of my new WordGirl stamps, along with a step by step tutorial!
This new release (shop link in the tab at the top!) is by popular request :) My 'Dream Big' WordGirl has been popular, but people seemed to want her without her words as well... so here she is!


Now, of course you could add a decorated dress to her simply by cutting one out. I thought I would show you how to use the stamp as a stencil, to give you a flat final stamped image with no glued on bits :)

Firstly, stamp the image twice..


(I just use a glue stick to stick the bare rubber to my block!)
Next, cut out the dress of one of the images...


As I like to use wet media to colour the faces of the girls, I always give things a coat of clear gesso to seal the underlying paper/cardstock first. That way no pilling/warping or distortion will occur when water is added! So... add clear gesso to the 'whole' image...


Once this is dry, place the 'stencil' on top. As I knew the girl was going to be cut out, the surrounding area didn't matter. So, I just glued the stencil around the edges and stuck it to the bottom image!


Start to decorate the dress! I sponged on paint...


Then did a little stencilling with sequin waste...


I then selected some circles from THIS Simon Says Stamp set, and added some black stamping to the dress...


More stamping, this time with some Simon Says Stamp dots and stars...


At this point, I decided less was more, and removed the stencil!


So now you have a girl with a decorated dress!


I coloured her face and hair (tutorials for this can be found in the video tutorial link tab at the top of the page!)


And then I added her (with a tiny clay heart attatched!) to the frame!


The background is a typical Trish painty mess (again, tutorials in the tab at the top)


And it was finished off with a chipboard phrase...


I hope you like it!
I am entering this piece into the Simon Says Stamp Monday Challenge this week: Stamp it!

See you soon!
Trish xxx

Friday 29 July 2016

Paperbabe Stamps Blog Hop!

It's Paperbabe Stamps third Anniversary month and we are here today to share a sampling of the NEW Paperbabe Stamps JULY 2016 release with you! 

FOUR new mini stamp sets and Three new substrate kits will be available to purchase on July 30th. You will find our new products HERE once they go live. 

To add extra fun to our blog hop...we are offering up a prize! 
Two prizes - 
The Paperbabe Stamps entire July's release and
a £25 gift voucher to choose what you like in the Paperbabe Stamps online store.

Here are the details:
  • Two winners will be chosen at RANDOM from any of the designer's blogs and the PaperbabeStamps Blog to win.
  • Just leave a comment on any of the designer's blogs listed below or the Paperbabe stamps blog for your chance to win! (you do not need to comment on all blogs to qualify but it increases your chances) 
  • Deadline: You have until midnight on Sunday, 31st July to leave a comment.
  • Please check the Paperbabe Stamps blog on Monday, 1st August to see if you are one of our lucky winners.

Kim has asked some great designers to join in our birthday hop...


I hope you enjoy our fun hop!
I have used the fabulous animals in a 3D scene today.....
I had that 'whistle while you work' thing in my head... a whimsy girl helped out by her woodland creature friends whilst she hangs the washing out!!!
The animals were stamped, cut out and then glued to the corresponding MDF shaped pieces. Nice and chunky for that 3D look!
The hearts and the 'smile' word are also MDF shapes, attached to wires to add that extra bit of detail.
I drew a whimsygirl, and added her into the scene. I think she rather likes her critter friends!
Your next stop along the way is the amazingly talented Kim Dellow!
Have fun, and good luck!
Trish xxx 

Friday 22 July 2016

Just Breathe....

Hello!
3 posts in three days.. must be some kind of record :)

My new series of rubber stamps has just launched over in my Etsy shop, so I thought I would share a couple of examples of art created with them!
The first is a little 3D creation, another StarTrishdesign/Rubber Dance collaboration!


I coloured WhimsyGirl 3 in soft pastel shades, but kept the Rubber Dance flowers black and white. I think the flowers look stunning without colour, and add a pefect backdrop... is she dancing through the daisies?!


My second creation featured another Whimsygirl, this one is Whimsygirl4. Very pink and summery I thought!


Her pink hair and dress are echoed in the mainly pink, smeared paint background!


Have a wonderfully creative weekend!
Trish xxx

StarTrish Design Stamp shop HERE
Rubber Dance Stamp shop HERE

Thursday 21 July 2016

Live your dream Wordgirl!

Hello!
Today I'm sharing another Rubber Dance/Startrish Design collaboration!
Bibi from Rubber Dance has also created some fabulous projects.... here a little look:


You'll find more projects, and more information on how to buy this amazing Textured Flowers stamp set (along with many more fabulous designs!) over on her blog HERE!

My project today features another girl from my WordGirl series 'Live Your Dream- Wordgirl4


I chopped off the bigger flower she was holding (in case you were wondering!), and glued on a smaller daisy from the Textured Flowers plate by Rubber Dance.


 The frame holds another painty background, all the stamping on this is also from the same Rubber Dance plate.... which is why I love it, so versatile!


I took the leaves from the plate and stamped them 4 times onto a scrap of painty card, cut them out and turned them into a butterfly!


I think it works well :)

Check back tomorrow..... there will be a sneak preview of my NEW WhimsyGirl series!!
Have a lovely day
Trish xx

StarTrish Design stamp shop HERE
Rubber Dance Stamp shop HERE

Wednesday 20 July 2016

More girls!

Hello!
Things got busy :)
I really REALLY meant to do more posts with art work to show off my Whimsy Girls!

Anyhoo... I'm here now!
Bibi from the amazing Rubber Dance stamp company and I have decided to do a little collaboration. I've created a few art pieces using my stamps alongside THIS fabulous plate from Rubber Dance! My girls will be appearing on some Bibi created, Rubber Dance art soon!
Here is the first creation:


As ever, there is a smeared, messy paint background involved! If you've ever wondered how to do these, I've made videos :) Check out the links on the tab under the banner at the top of the blog!
The fabulous flowers were put onto the background using the stamped tissue technique...


The line drawing style just goes so well with the girls!


My 'Make A Wish' Wordgirl4 was actually given a sensible hair colour for once! Don't know quite what happened there!


I'll be back tomorrow with another Trish/Rubber Dance creation!

StarTrishdesign Stamp shop HERE
Rubber Dance Stamp shop HERE

Love Trish xx


Friday 1 July 2016

And breathe.... :)

Hello!
I have a special announcement :)
Regular viewers here may notice the old blog has had a bit of a makeover.... why?
Well.......

Today I am launching my first ever range of rubber stamps!

It's very very scary, but also a bit exciting too! As you all know, I've been addicted to rubber (stamps!) for hundreds of years :) I thought it was about time I actually stopped thinking about creating my own, and actually DID something!
So, my range of whimsical girl stamps is launched today! I'm launching the first 5 in the Wordgirl series first :) There will be lots more to follow....
The Wordgirls are my hand drawn whimsy girls that you may have seen over the past couple of years, all with a zentangle-y phrase in their dresses. My 'poster girl' is below..... she seems to sum up today for me!


The stamps are unmounted, deep etched red rubber, and are a nice chunky size (round about 6cm by 12cm depending on the design) Perfect for Art Journalling, putting on canvases or any other kind of art panel.
Speaking of art panels....


Just another example of art work I've created with the girls, there will be lots more from both me and some talented friends over the next few days!

My stamps are now available to buy over on Etsy HERE. They cost £6.99 each (not including shipping)

I think I need a lie down in a dark room........


Love Trish xx


Saturday 11 June 2016

Our House: For PaperArtsy

Hello!
I'm thrilled to have a project over on the PaperArtsy blog tonight!
The theme is 'Our House', and I have made a bit of a bonkers 3D extravanganza :)
Here is a little sneaky peek:


Told you it was a bit bonkers!
To see the whole thing, and a step by step on how I made it, please hop on over to the PaperArtsy blog HERE!
See you soon,
Trish x

Wednesday 1 June 2016

Our Creative Corner: June Challenge

Hello everyone!
The June challenge is now live over at Our Creative Corner... our host this month is Joi, and the theme is....

 How about getting messy?? Can you do it with me???
Can you be free and filthy? Are you brave???
I believe YOU can do it... you can create...
 
A Beautiful Mess

Whether you make a messy looking project or just use 'messy' techniques...
we want to see every inch of your  'Beautiful Mess'!

Our sponsors are...

The winner this month will receive a $20 voucher from our generous sponsor!
 
As I generally make a mess whenever I create, I decided to challenge myself a little bit further and create a messy project... but in a clean way :)
Here is the result!


I made a masterboard, using very messy paint smearing, then cut a sqaure and added it to a plain white card blank. So, a Trish version of clean and simple maybe?!

I hope you'll hop on over to the OCC blog, and take a look at the other amazing projects from my teamies... and join in with the challenge!
See you soon
Trish x

Sunday 1 May 2016

May Challenge at Our Creative Corner

Hello!
It's time for another challenge over at Our Creative Corner! Jennie is our host... so I will pass you over so she can introduce her challenge theme :)

Hit the Books

I adore old book paper and old books and I am always glad to be able to breath new life into a dilapidated book which most people would consider throwing out!

For your projects this month we would like to see you searching through your stash for old book paper or books and create a project with what you find. You might want to use papers within your project or you might want to breath new life into an old book by altering it in some way. I hope I have chosen a challenge theme with huge scope for projects small or large.

Whatever you make let us see you give those old book papers or books centre stage!


Our Sponsor this month....


The winner this month will receive a huge bundle of goodies from our generous sponsor!
So, what did I make?
I am clearly on a bit of a jewellery 'thing' right now... I made a necklace..


I used book pages as the base for each 'leaf'..... glued to the twisted wire shapes..


I trimmed around them, then filled each leaf in with glossy accents, dyed with Distress reinkers to give the glossy jewel tones...


I can't wait to see how you use book pages in yout art! Link up (and see all the fab creations from the rest of the team) HERE!

Trish xxxx

Wednesday 27 April 2016

A WOW! Blog hop!

 Hello!
I have loved being part of the WOW! Embossing Powder Design team!
As a last 'hoorah' (!) we are having a blog hop combining both the 2015and 2016 teams... with some amazing prizes along the way!

 Please leave a comment on each of the Design Teams posts as you hop, this will enter you into the draw to win some not-yet-released WOW! products. We will be giving away 1 of each of these sets to three lucky winners! The new products will be available from May onwards, for those who miss out :)

Set 1:
Designed by Marion Emberson: Hey Little Flower Stamp *NEW*
Designed by Marion Emberson: Just Saying Stamp *NEW*

Set 2:
Designed by Marion Emberson: Strawberry Sundae Embossing Powder *NEW*
Designed by Marion Emberson: Blueberry Cheesecake Embossing Powder *NEW*
Designed by Marion Emberson: Peppermint Tea Embossing Powder *NEW*
Designed by Marion Emberson: Banana Split Embossing Powder *NEW*
Designed by Marion Emberson: Mint Macaroon Embossing Powder *NEW*

Set 3:
Buttons Mould
Hearts Mould

WOW Blog Hop list:


Laurence Colling

Please leave comments on each stop by Saturday 30th April at 11:59 PM BST for a chance to win. Good luck and happy hopping :)

Where to Buy WOW! Embossing Powders:
US Shop


So.... that's the official stuff out of the way! What did I create for the hop? 
This little lady...


Lots of WOW! powder on there! 
Her dress is one large bit of triple embossing. I melted three layers of clear Ultra High powder, then added a top layer of Fluorescent Blue powder to give the colour.
Once the blue was cold, I sponged Versamark ink through some sequin waste, then added bright white super fine powder Once this is melted in, it gives the fabulous dot effect!
For more interest, I also added a teeny pinch of Primary Apple Red and Pastel Glacier mint to give the blue and red speckled effect.... 


I also used silicone moulds for my 3D embellishments! Miss Serenity has a blue flower in her hair....


and is carrying a red posy..


Both are made using the Blossom Mould.     The glitter effect is created by adding a teeny tiny sprinkle of Sparkling Snow powder into the mould before adding the molten coloured powder. The glitter powder has just enough heat to be melted onto the surface of the blossom, but not so much it all blends in and some sparkle is lost! Looks very glittery in real life :)
The blossoms are made from Apple Red and Fluorescent Blue powders. The blue turns paler once you heat up a lot of it and mix it around! 
I hope you like her.... a nice combination of hand drawn whimsy and  WOW!


So.. your next stop on the hop is  Fran ! 
Don't forget to leave everyone a comment, and good luck in the draw!
Trish xxx