Wednesday, 12 February 2014

Stampotique Part Two!

Hello!
I can't believe it has been a week since my first Guest Designer spot for Stampotique!
THANK YOU to all those who left such nice words about my first piece, I was very touched!
The second challenge this month over on the Stampotique Designers Blog is 'Perfect Pairs', so I've created this painty panel...
Lots of 'pairs' going on here!
I'll take you through the 'how to'.....
I used a Tando chipboard panel as my base, and painted it white first to get rid of the grey chipboard colour. Then, the first of my pairs...(or my 'twos' !) I've used two colours of paint, blue and pink, smeared onto the base...
Next, I stencilled a few circles. In pairs, of course!
You can cover parts of your stencil with masking tape, that way the paint will only go through certain parts. I left two circles free of tape in my sequin waste. I did the same thing with smaller sequin waste, then added dots...
So, lots of pairs of circles! I then added pairs of lines and dots in the base colours of blue and pink..
A little stamping....the number '2' of course!
(edged in black, and with a few black ink splats to tie the black stamping into the background)
I cut two stripey stalks from card (just like we created legs for the art doll last week), and then added two stamped stars...
I added a hanger by means of eyelets (two!), and threading with two strands of cord...
So...lots of pairs going on!
Stampotique Stamps used:
Jos Star
Number Cubes

See you next week with more step by steps for another Stampotique project!
Trish xxx


Sunday, 9 February 2014

Tone on tone paint effects!

Hello!
Sometimes, life just goes bonkers and you end up forgetting everything......well, I should have posted this HOURS ago...... big oops!
My DT post today for A Sprinkle Of Imagination is all about using waste, painty scrap paper as your main focal image.... here is a little peek...
I would love it if you went over to the ASOI blog and had a look at the whole thing!
See you tomorrow!
Trish xx


Wednesday, 5 February 2014

Stampotique News!

Hello!
I'm very pleased to be able to share something today...I'm a guest designer over at Stampotique Designer Challenge for the month of February!
I'll be sharing a project each week, and I'll have all the step by step pics to show you how I created them all!
My first project has gone live today....and here she is!
A quirky art doll..... couldn't resist! The theme this week is all about hearts, so I included a couple of heart wings as well as the main, shiny red heart Miss Snottie is holding!
So, how did she come into being? Grab a cuppa, this could take a while!.....
First, we need a base for her body. I made a cone...
Easy peasy, draw around a plate, cut a slit up to the centre point, then wrap around itself until you have the cone shape you want. Glue and a bulldog clip  to fasten it together. I then painted it blue, just in case there were any gaps in her 'dress'. Didn't want the white showing through...
Next, paint up some scrap card in different shades of green and blue, then stamp the banner onto them...
Cut out each triangle flag....
Of course it depends on the size of the cone, but I reckon I needed nearly 200 of these triangle flags to cover mine....yep, each one glued on individually....
(You won't see the very point of the cone, so no need to go all the way up to the top)
I made her stand next....
I make these a lot, and they are dead easy to do. I shared a little tutorial before Christmas HERE on how to make them!
Next up, the wings. Paint more card, then stamp a background stamp repeatedly on it. The large heart was then stamped twice over the top....
Once cut out, these are ready to be assembled. The small heart was also stamped onto painted card. I gave it a coat of Glossy Accents for a nice shiny effect.
Now, legs. I love stripey legs, and the easiest way to do them is to draw stripes onto scrap card....
Then cut out into a leg shape! I've added fine lines, and some red glitter shoes....
I used wire to make arms for my art doll. This is easy once you get a feel for bending and twisting wire into the shapes you want, so have a play with some scrap wire first if you're not sure!
The last piece to be made was Miss Snottie herself! Stamped and coloured with a combination of paint and Promarkers...
Cut her out, then we can begin to assemble!
I stamped a phrase onto copy paper (not card! Copy paper is much more flexible when you want to stick it on a curved surface!), then added it to the base...
The legs were then glued to the vertical wire, and the cone placed over the whole thing. The wire arms were glued on the back, and shaped to look like they are holding the heart...
They aren't actually holding it, the heart is glued to the dress! The wings went on over the arms...
And last, but certainly not least, Miss Snottie was glued in position!
All done!
I really hope you like her, I had a ball making her!
Stampotique stamps used:
Banner
My Heart
My Heart Small
Seaweed
Miss Snottie
Love and be loved


Friday, 31 January 2014

Melting!

Nope not melting with the heat...I wish! Blizzards and sleet have been the order of the day here in Blackpool!
Melting in terms of UTEE.....! Today over on the A Sprinkle Of Imagination blog, I'm sharing a little tutorial on how to create melted UTEE tiles...to be used as jewellery, or on their own! Here is a little taster...
The blog can be found HERE , so why not pop over to see how I made it?
Have a great weekend!
Trish xxx

Friday, 24 January 2014

Metal heart...

Hello!
This weeks DT project for A Sprinkle Of Imagination is a faux weathered metal heart..... here is a little look..
I'm sharing some pictures over on the ASOI creative team blog today showing how I made this...I hope you'll pop over and have a look!
Trish xx

Friday, 17 January 2014

Craft Stamper Blog Challenge...

Hello!
We're currently halfway through the latest challenge over at Craft Stamper!
The current theme is 'Ombré'..... sounds scary, but it's really not. Just add colour to something in a gradient from light to dark (or dark to light!) I've used the technique in this simple card....
I painted my card with turquoise paint in the ombré style, then added stencilling, printing and stamping...
This tiny honeycomb stamp is by Indigo Blu... just love it!
 I then stitched the panel to some black cardstock, and added a few extra decorative stitches here and there. White rub ons for a little more detail...
Then my focal point...a red punched out heart. Stitched on...
The sewing machine jumped a little for some reason, but I quite like the effect!

Why not join in with the challenge, there are some great prizes to be won! All the details are HERE!
http://craftstamper.blogspot.co.uk/2013/12/take-it-make-it-challenge-six.html

Love Trish xx


Thursday, 16 January 2014

Celebrate The Unconventional...

Hello!
Over at A Little Bit Crafty, it's halfway through the January 'Celebrate' challenge...still plenty of time for you to enter!
My take on the theme is a little, well, unconventional....
I smeared on different colours of paint to my background cardstock, then did a little stencilling, stamping and splattering!
The background was stitched to some plain black card to give a bit of a frame effect. My figure is from The Octopode Factory...
This is a digi stamp (no, don't faint! I like using digis when the image is a fab as this!) I've coloured her with a combination of Promarkers, Distress markers and paint (using a waterbrush)
She is standing on my favourite washi tape, with a few bright flowers...
These flowers are by Petal Lu (on Facebook HERE). I sprayed white flowers with ink sprays to blend in with my colour scheme!
Have a good day everyone!
Trish xxx


Wednesday, 15 January 2014

Go With Your Heart: ASOI Colour Challenge!

Hello!
It's time for the next colour challenge over at A Sprinkle Of Imagination!
This month we are playing with this palette:

Gorgeous colours!
Anyway... I made this:
A painty, texture-y (is that a word?!) panel!
I haven't done a step by step on here for a while...so brace yourself, there a few pictures to follow! Don't forget to click on them to make them bigger, some details are a bit subtle so the smaller pics look very similar!
First, cover a chipboard panel with a few interesting textures, and paint white...
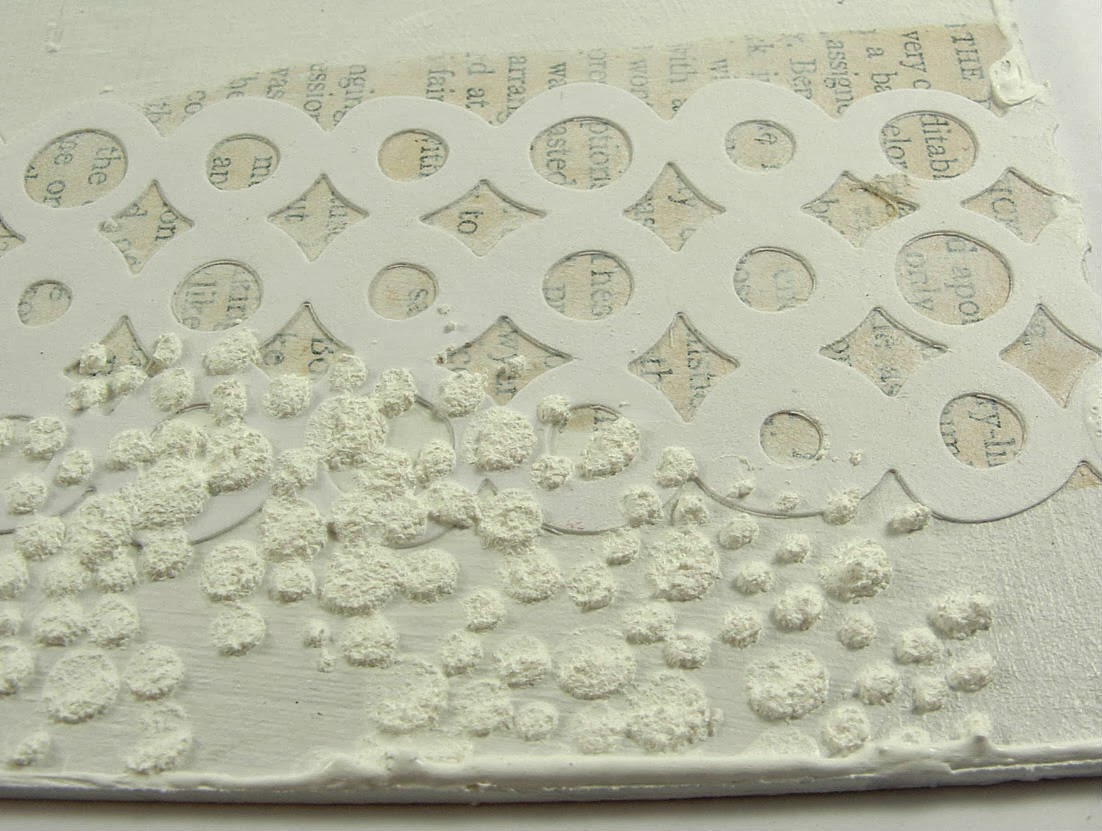
I added torn text paper, a die cut strip, and some puff paint applied through a stencil...
I then smeared on some teal paint....
and then some pale lime....
Bit bright, so I knocked it back with a  layer of white...
Much better! I then stencilled through sequin waste with white and lime paint...
Bottle top printing...
More printing, but using lilac paint as a 'pop' colour...
Random background stamping using black ink...
I then stamped a focal point using these Prima stitched circles. The stamps separate to become individual circles, but for this I kept them all fitted together!
I added a little more bold black printing to balance out the bold black stamping...
That's the background done.... now to add the figure, one of my favourite Stampotique stamps...
A few closeups of the detail....
Die cuts make great shapes to paint over!
Puff paint gives great texture!
As the die cut is raised, the stamping (if you're careful!) will only show on the raised bits, a nice detail!
Hope you like it...and I hope you'll join in with the challenge! You'll find all the details on the ASOI blog HERE....
Have a great day!
Trish xxxxx


Monday, 13 January 2014

Playing with Triple Thick glaze...

Hello!
 I've been playing with Triple Thick glaze for my Calico Crafts DT project this week....
I wanted to see how it worked over some texture...
Why not pop over the the Calico Crafts blog and see what I thought of it!
Have a good week..
Trish xxx

Saturday, 11 January 2014

Stargazing- Experimenting with niches!

Hello!
I'm still sticking to my new years resolution, yay! Today, as part of my 'do stuff you haven't done for ages' plan, I'm sharing a little 'niche' project!
I love turning a canvas over, and using the back as a niche to put stuff in...and I haven't done it for ages! So...'Stargazing hares' was born....
Now, as this is a DT piece for A Sprinkle Of Imagination, you'll need to hop on over to the creative team blog to see all of it! There are floating stars on wire, spools, and LOTS of painty details!
Have a nice weekend everyone!
Trish xx